Step 1: Create your custom media wall layout
Begin by dragging your mouse over tiles to create your media wall layout.
Learn how to create a layout and playlists in our “Getting started tutorial.”
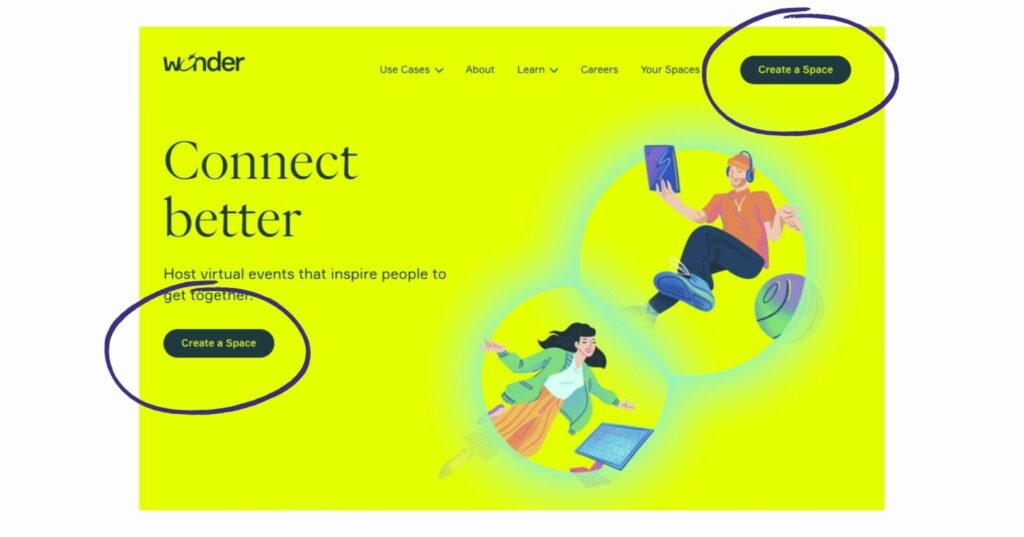
Step 2: Set up your meeting space with Wonder
Step 3: Add Wonder as a content source
Let’s add your Wonder meeting space to the doWow playlist.
- Copy the URL of your Wonder meeting space
- Choose Wonder as a content source in the doWow dashboard
- Paste the Wonder meeting space URL into the search field
- Activate your Wonder meeting space by checking the preview box
- Click on any tile on the media wall to add your Wonder meeting space.
Tip: To see how the meeting space appears on the media wall, use the preview “eye” button. Make sure there is enough room for the Wonder meeting area.
Some ideas on how to enhance your networking events
Add Spotify playlists
Connect your Wonder gatherings with Spotify playlists to make them more fun. Try some motivational music for business planning meetings or relax to some lounge music between workshops.
Check how to add a Spotify playlist here.
Embed Typeform
Put Typeform right next to your virtual meeting space to engage your audience in a feedback or lead generation process.
Here is how you can add a Typeform:
- Copy your Typeform sharing link
- Choose iFrame as a content source in the doWow dashboard
- Paste the Typeform link in the search field
- Check the preview box on your Typeform to activate it
- To add to the media wall, click on any tile (the Typeform will fit to any tile size).
Plug in social media feed
By integrating Twitter or Instagram feeds together with your Wonder meetings, you can boost user-generated content and hashtag relevance. Run social media contests and encourage your audience to share your event on social media:
- Choose Twitter or Instagram as a content source
- Type a specific hashtag you’re looking for in the search bar (alternatively, you can search for Twitter content without using hashtag)
- Filter your search by choosing to see retweets, images or videos only
- Choose Twitter posts and add them to your playlist by clicking on +
- Moderate your playlist items using
Add collaboration area with Miro
With Wonder as a meeting room and Miro as a whiteboard, any virtual meeting can easily be turned into a workshop or brainstorming session.
This is how you can add a Miro board to your networking space:
- Extract the embed link of your Miro board
- Choose iFrame as a content source in the doWow dashboard
- Paste the Miro board embed link in the search field
- Turn on your Miro board by clicking on the preview checkbox
- Click on any tile to add it to the media wall
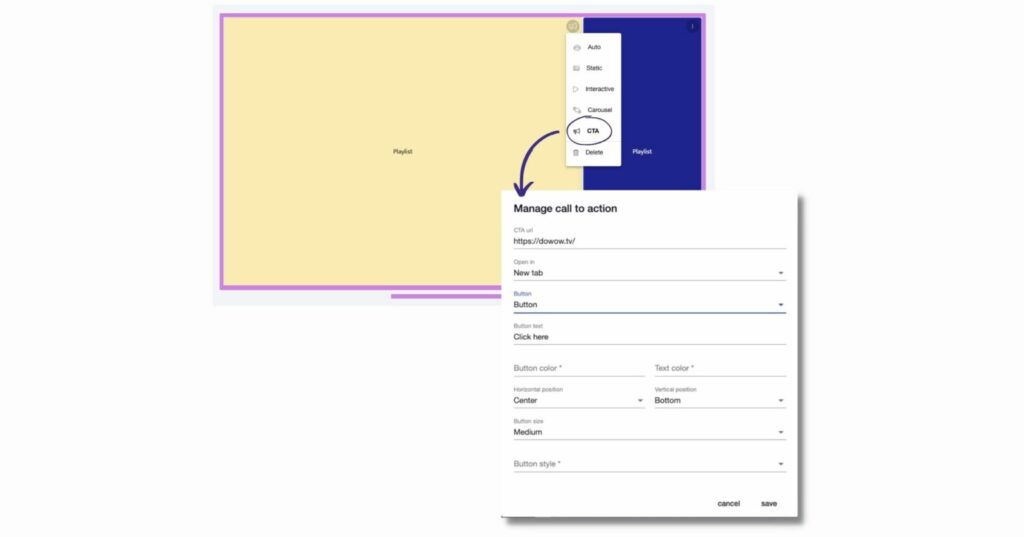
Add calls to action
Any tile on your media wall can be customized to include a call to action:
- Click on the three vertical dots (ellipses) at the top right corner of a tile and select CTA
- Add a text and a link to your call to action
- Choose the button position & colors
- Press “Save” & use preview mode to check how it looks

